- Mon - Sat: 9AM-6PM & Sun: 9AM-5PM
- 1440 Kearney Street, Denver CO 80220
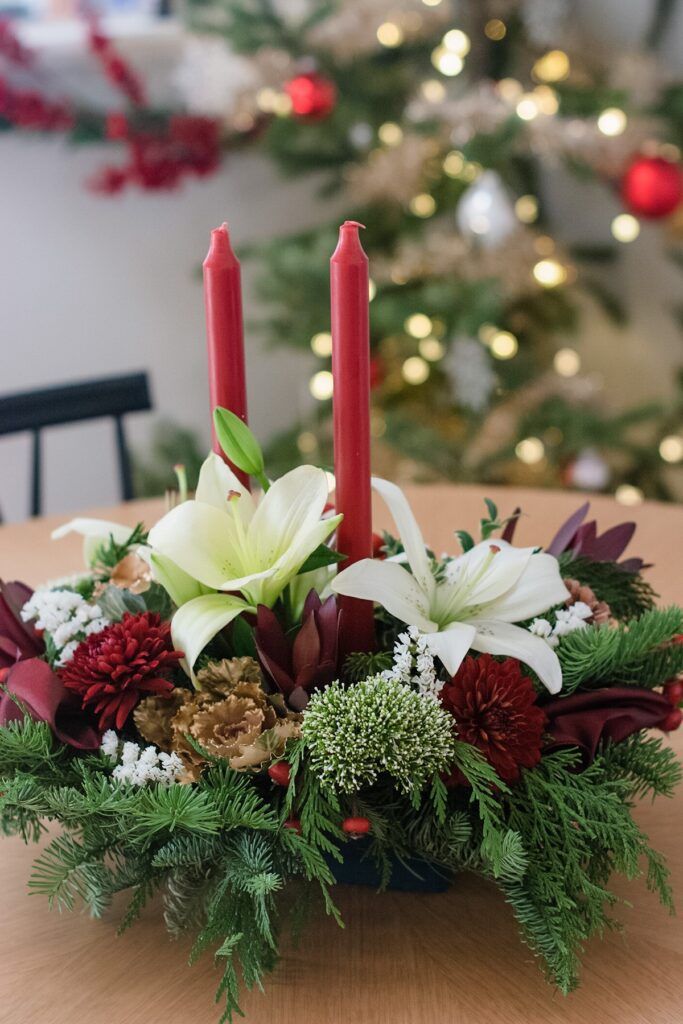
How to Make a Holiday Centerpiece Arrangement

Making a beautiful floral centerpiece for your Christmas dinner or holiday party is quick and easy when you have the right supplies. You can make your centerpiece as simple or as extravagant as you want. Your guests will be impressed either way!
Stop by City Floral to pick up your supplies, and then follow the step-by-step tutorial below.
Supplies:
- Centerpiece elements: a variety of greenery (evergreen tips and boughs, magnolia branches, eucalyptus, etc.), large floral elements in one or two main colors, one or two smaller elements in accenting colors (berries, wax flowers, pine cones, etc.), candles/candle-holders. You can really get creative with this–express your personal style!
- Container (if it is water-permeable, you’ll also need cellophane to line the inside)
- Floral foam block
- Floral wire (optional)
- Pruning shears
- Large knife for cutting foam block (optional)
- Water
Step 1: Gather Supplies

Gather all of your tools and supplies. Having everything within reach will make the process go more smoothly. Bring things you think you may not use, too, just in case.
Creating a centerpiece arrangement is an art. You might add elements or take them away as you move through the process, depending on what looks and feels right to you.
Step 2: Soak the Foam + Prep Container

If you are working with live elements like fresh greenery and cut flowers, you’ll want to soak your floral foam before you begin. Once you cut the stems and place them into the foam, they will start taking in water immediately. This is what keeps the arrangement looking fresh.
This is also the point when you will need to line the container with cellophane if it cannot hold water.
Step 3: Build the Base

If you are using greenery, this is where the bulk of it will be used. Cut smaller pieces off of large branches to make it easier to arrange. This will also make it easier for the foam to hold the pieces in place. Fill out the sides and top of the block by pushing the stems an inch or two into the foam. Use a variety of different types of greens to add texture and visual interest.
*A rule of thumb to keep in mind as you’re designing: The final arrangement should be no more than 1.5 times higher or wider than the container.
**Special Note: If you will be adding candles, be sure to place the candle holders into the foam before you begin adding the greens.
Step 4: Add Colors + Textures

This is the extra creative part! You can add as much or as little color as you want. If you already have a décor color theme going in your home, you can match it up with that.
For a more traditional Christmas look, go with shades of red and white to contrast the greens of the base. For a softer feel, use more neutral colors like creams, pinks, browns, and light greens. If you like some sparkle, add glittered pine cones or ornaments.
While you’re shopping for supplies, take some time to get lost in the floral arrangement area, and pick up whatever speaks to you!
Step 5: Finishing Touches
Once the centerpiece looks the way you want, you can add some finishing touches.
You may want to add ribbon and a bow around the container, or wrap it in decorative paper. Dust some glitter on it, perhaps?
You’re finished! *High-five*
Tips to Keep it Fresh
- Cut stems at an angle
- Keep the foam wet so the plants have a water source
- Cut the flower stems longer at first, then trim the ends periodically to keep them drinking
- Keep the centerpiece cool — if there’s room in the fridge, store it in there overnight
If, after reading this tutorial, you decide not to make a holiday centerpiece yourself, don’t worry! We’ve got you covered. We make tons of centerpieces in-house at City Floral. Stop by and pick one out!