- Mon - Sat: 9AM-6PM & Sun: 9AM-5PM
- 1440 Kearney Street, Denver CO 80220
How to Make a Wood Mounted Hoya

Many epiphytic plants are kept as houseplants and can be either potted or mounted on wood or cork bark. Today, we’re making our own wood-mounted houseplant! Read a little bit about epiphytes, or the types of plants that can be wood or cork mounted, and scroll down to learn how to make your own!
What’s an Epiphyte?
Epiphytes are plants that grow on other plants in nature (typically trees). Any nutrients they need are found in the air, water, and debris around them. Epiphytes need humid, moist environments to really thrive.
What Plants are Epiphytes?
A few epiphytic plants that are also common houseplants include hoyas, bromeliads, and some ferns. These plants can be potted or mounted on a wooden plaque. Keep in mind: the term “epiphyte” refers to the the nature of the plant’s growth, so there are many different types of epiphytes that are not related.

How Do I Make My Own Mounted Plant?
Select which type of epiphyte you would like to use for your wood mount. Hoyas and staghorn or bird’s nest ferns tend to be the most common for this type of display. We’re using a hoya in our example and we love how these plants will trail down the wall.
Supplies
- Epiphytic plant
- Cork bark or hardwood (Cork bark will be the most ideal material for your mounted plant but you can also use a variety of hardwoods, we’re using wood in our example. Cork Bark can be found online and small pieces are available at some pet stores.)
- *Finishing nails and hammer (*Nails are ideal if you’re using wood but not required on cork bark. Quantity will depend on the size of your plant.)
- *Mounting Hardware or Wire (*Mounting hardware such as a keyhole picture hanger is great when mounting to wood. Wire is best for cork bark.)
- Sphagnum moss
- Sheet moss
- Fishing line
- Scissors
- Pencil
- Drill
Let’s DIY!
We have a short how-to video available here and all the steps you need to follow below!
1. Start by prepping your wood or cork bark with a way to mount it onto your wall.
Cork Bark- If using cork bark, carefully drill a hole through the top of your piece of bark. This will allow you to add a wire hook.
Hardwood- If using wood (like in our example), attach mounting hardware to the top back of the piece of wood. We used a keyhole picture hanger which can be found at your local hardware store.
2. (Skip this step if using cork bark) For mounting your plant to a larger piece of wood, it is easiest to create a ring of nails to attach your fishing line. Start by placing the potted plant you will be using. Place the plant where you would like it to sit on the wood. Using a pencil, trace the pot for a rough idea of placement and size. Next, begin hammering nails in a circle about an inch larger/outside of the circle you traced. This will serve as the attachment points for your fishing line when you wrap your plant.
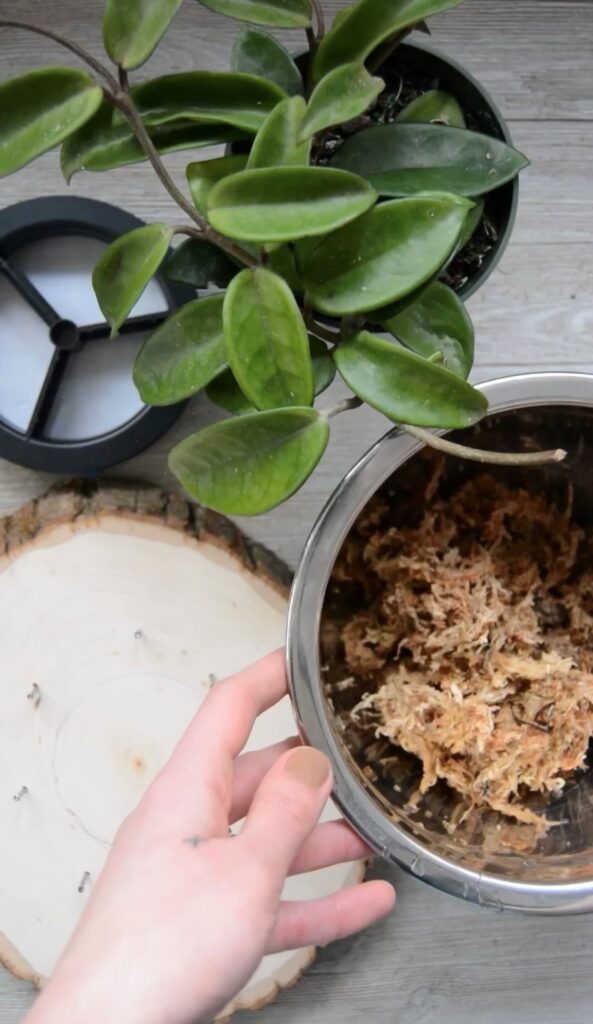
3. Next, take your plant out of its pot and gently remove all of the soil.
4. Take a handful of sphagnum moss and place it on your wood or cork bark where your plant will sit. Next, place your plant on top of the moss in the direction you would like it to be displayed. You might choose to display your plant in a more upright orientation or tilt it out to see more of the foliage when mounted on your wall. Play around with how you want it to look before attaching!
5. Add more sphagnum moss on top of the roots.
6. Add a layer of sheet moss on top of the sphagnum moss. This step is somewhat optional, you may choose to just begin wrapping your sphagnum moss layer. However, the sheet moss makes things a little easier and cleaner and looks a bit neater.
7. Grab your roll of fishing line.
Cork Bark- You’ll be wrapping the fishing line across the back of the cork bark and over the moss on the front. Unravel some fishing line from the spool (but keep it attached, don’t cut a length) and lay your bark on top. Bring the end and spool of fishing line to the front, over the center of the moss on your plant. Tie a double knot tightly at the front of your mount. Trim the end of the fishing line. Begin wrapping the fishing line around the entire piece of bark, tightly wrapping the moss and plant to hold it in place. When you have sufficiently wrapped the plant so that it is secure on your bark, tie a double knot at the back and trim the end.
Hardwood- Cut about a 4′ piece of fishing line off the roll (We’re using a plant from a 4″ pot. You’ll need a longer length if using a larger plant). Tie one end of your fishing line to a nail on the front of your piece of wood. Begin wrapping the fishing line tightly over the moss, from one nail to another. Make sure to keep it pulled tight across the moss. Wrap until the fishing line is covering the moss well enough to hold it securely in place and you’ve reached the other end of the length of fishing line with enough room to tie it off onto a nail. Tie the end.
8. (Skip this step if using hardwood) If you’ve mounted your plant to cork bark, cut a piece of wire long enough to place through your drilled hole and twist into a hook.
9. Decide where your new plant will hang and get it up on that wall! Stand back and admire your handy work…and then make another, because a whole wall install is an eye-catching display you’ll love in your home.

How Do I Care for Mounted Plants?
They’ll need bright, indirect light and a good weekly soak in room temperature water. Let the plant soak for about 30 minutes then remove and shake out excess water and allow to dry somewhat before re-mounting on your wall. Relatively high humidity is also helpful along with a temperature in the 65°F-85°F range.